
Set Up Targeting In UpRival
Using UpRival's advanced targeting features to better segment your online traffic.
Targeting allows you to show ads to specific audiences based on the conditions you set up. It can be set up on an ad group level or on an ad level under the section labeled “Targeting”. Click here for step-by-step instructions on how to create a targeting profile.
UpRival allows you to enable a number of targeting options to control conditions upon which your ads are being served: GEO Targeting, SubID Targeting, Browser Targeting, IP Targeting, Device Type Targeting, Carrier/ISP Targeting, IP Type Targeting, Proxy IP Address Targeting, User Agent, Operating System and Language. For details on how to set up each of these types of targeting, click any of the links above.
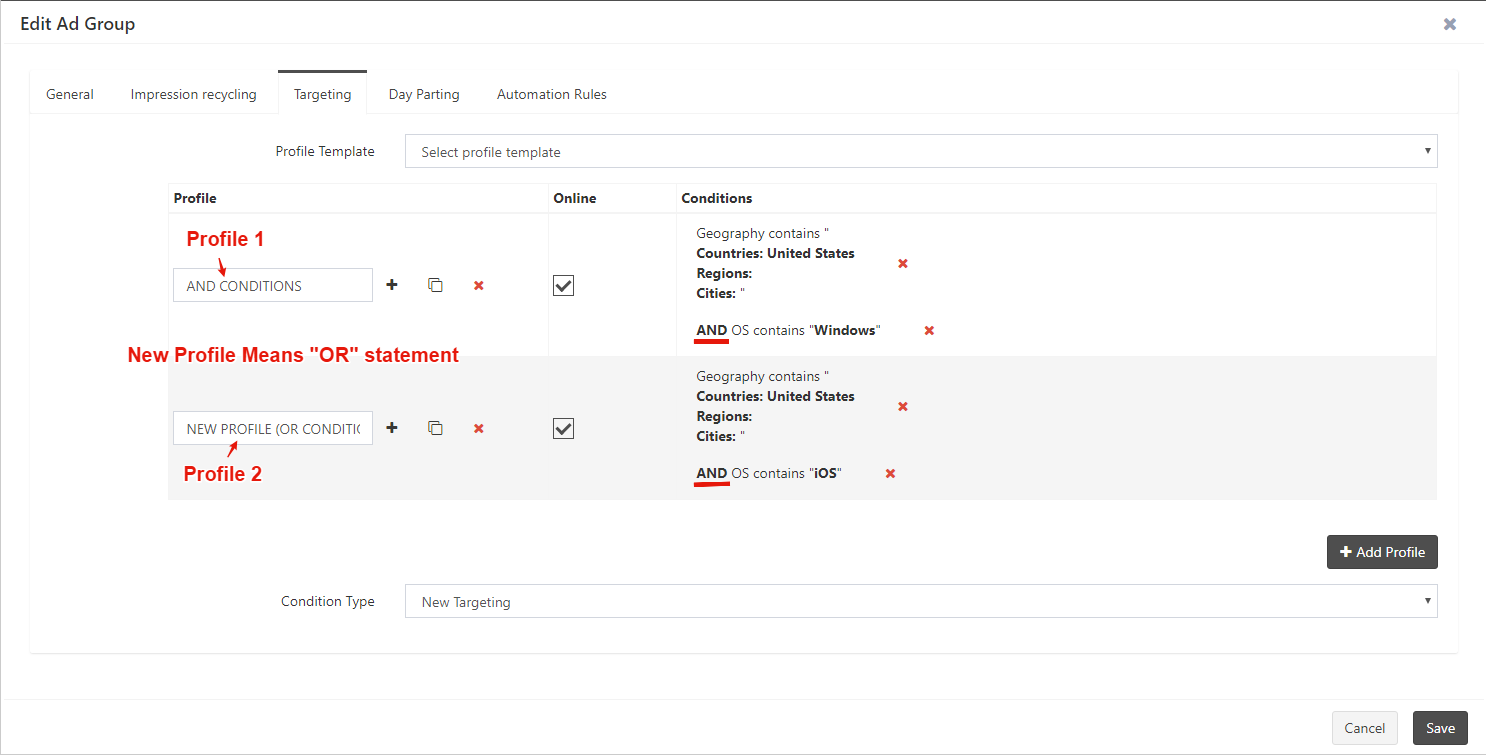
Any conditions added to the same profile will be AND conditions, meaning that all conditions must be met in order for the ad or ad group to be served. To create OR conditions, you will create a new profile. If there is more than one profile, then all conditions in Profile 1 must be met OR all conditions in Profile 2 must be met, etc. for the ad or ad group to be served.
Warning:
If you have targeting set up that will potentially stop an ad from being displayed, you must have a backup ad(s) that either has the equal inverse targeting or has no targeting. If this is not done, you run the risk of being charged for an impression WITHOUT SERVING AN AD.
Once you have created the targeting profile, it is advisable to change its default name. You can save frequently used profile conditions as a template in the profile templates section. You can also turn targeting profiles on or off.
You can also watch this how-to video to see how targeting can be set up.