
IP Targeting
Learn how to set up IP Targeting on your Uprival account.
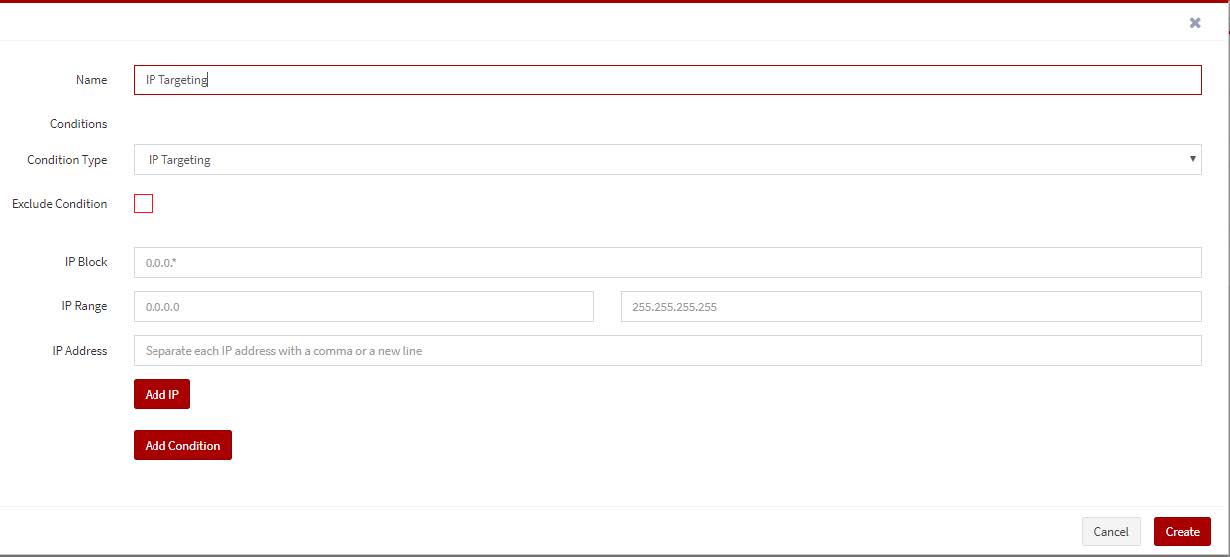
To create a targeting profile by IP address, first select “Target IP Address” from the conditions drop-down menu. Here you have three options: IP Block, IP Range, and IP Address.
For IP Block, you will type the first two numbers of the IP block you would like to target.
For example: if you type 12.12., users who have IP addresses from 12.12.0.0 to 12.12.255.255 will be the target.
For IP Range, you will type the range from the IP addresses you would like to target.
For IP Address, you can type in one specific IP address you would like to target. You can add multiple IP addresses by copying and pasting a list into the input field. IP addresses in your list need to be separated by a comma, or a new line.
Click the “Add IP” button to submit your input IP address criteria.
If the “Inverse Condition” box is checked, then the ad or ad group will NOT be served to the selected IP addresses. Click the “Save Criteria” button to add the IP addresses to the profile. Then, click the “Save and Close” button to save the targeting profile.
Warning:
When you use IP targeting on an ad or ad group, you must have a backup ad or ad group that will be served to users that do not meet the IP conditions you have set.
Any conditions added to the same profile will be AND conditions, meaning that all conditions must be met in order for the ad or ad group to be served. To create OR conditions, you will need to create a new targeting profile. If there is more than one profile, then all conditions in Profile 1 must be met OR all conditions in Profile 2 must be met, etc. for the ad or ad group to be served.