
YouTube Video Ad
Learn how to create a YouTube video ad placement in UpRival.
Once you’ve created a placement, the next level is the ad/ad group level. To create a video ad group, follow these steps:
- Create a new Ad Group.
- Set Group Type to “Video Ads.”
- In the “Video Ad Style Formatting” drop down menu select the “YouTube Style”.
- If the “Default Video Style” is not available you need to copy this style in the Text Ad Style section to match the dimensions of your placement.Create a new text ad style, select Video Ad as the Ad Style TypeSelect “Youtube Style” in the “Copy Existing Style” drop down menuSet the width and height to match the width and height dimensions of the placement you want to add video ads to.
- Create a new YouTube Video Ad, YouTube Video Ads are used when you are serving a video file hosted on YouTube.

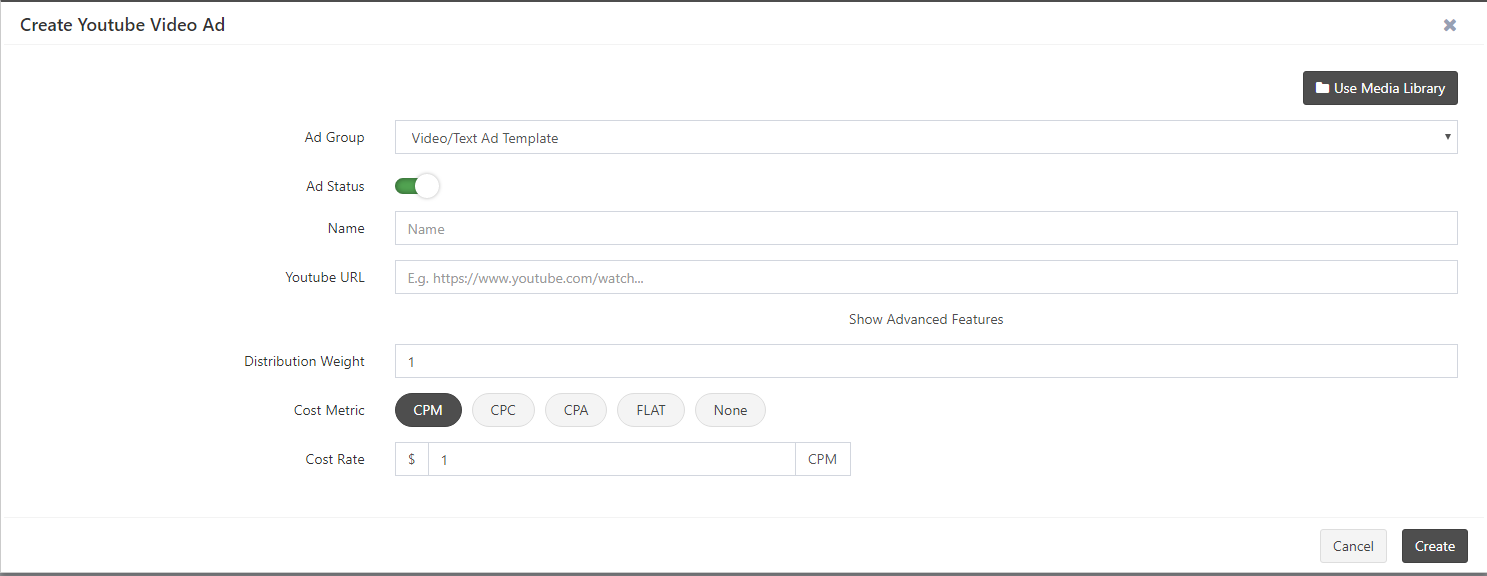
Once created, you can go in and create your YouTube ad by filling in the following fields (advanced features shown as well):
• Choose the Ad group that the ad will go into
• Status (options: offline, online) of the Ad
• Name of the Ad
• YouTube URL. Use the YouTube embed method (https://youtubeembedcode.com/en/). Click Preview if your video thumbnail is not being displayed in the top of the form.
• The distribution weight
• The cost metric and cost rate you would like to be charged by.
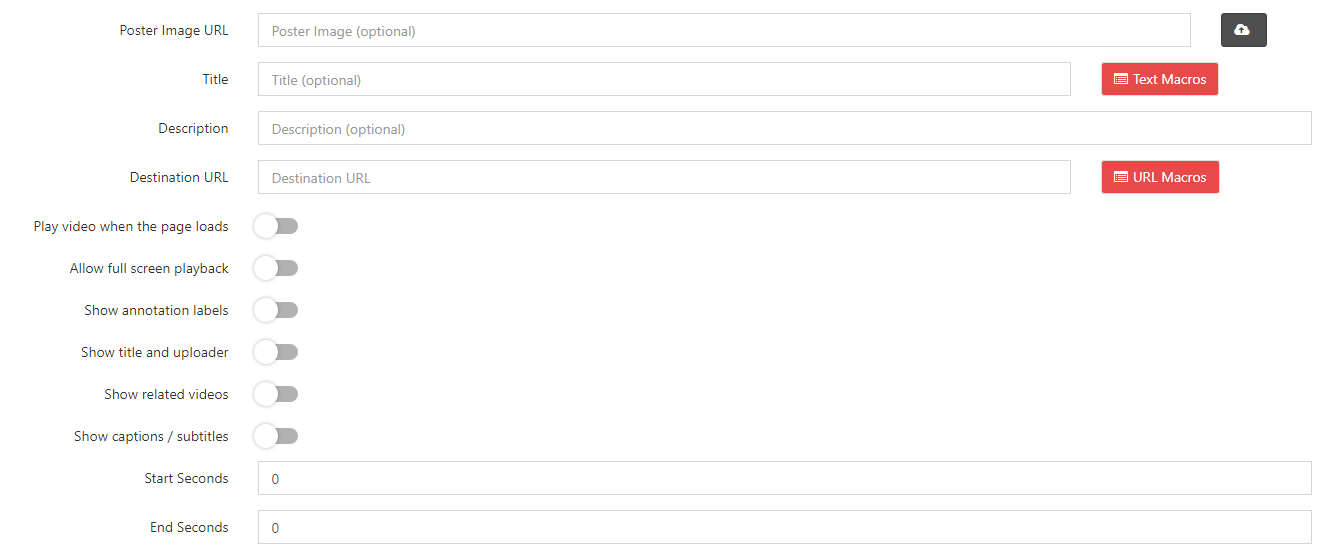
As advanced settings, you will be able to enable the following options:
• Add poster image URL or upload an image
• Enter the title of the Ad
• Description i.e. content of the Ad
• The destination URL, an URL where the user will be re-directed once they have clicked on the ad.
• Play video when the page loads
• Allow full screen playback
• Show annotation labels
• Show title and uploader
• Show related videos
• Show captions / subtitles
• Start Seconds (add seconds)
• End seconds (add seconds)
You can also copy existing ads from the library by clicking the Use Media Library or Add Multiple Ads From Media Library.
Additionally, for creating multiple ads quickly, you will be able to use the “Save & create next Ad” option on the same window. Once you click on this option, the system saves the currently created ad and displays the “create” window again.
Every ad can be edited by clicking on the Edit option. The form with the previously added information will appear where you will be able to modify the existing data. Click on the Save button in order to save the changes you have made.