
Get Pixel Tag
Learn where to get the pixel in the UpRival system, the embed methods available and where to place your pixel.
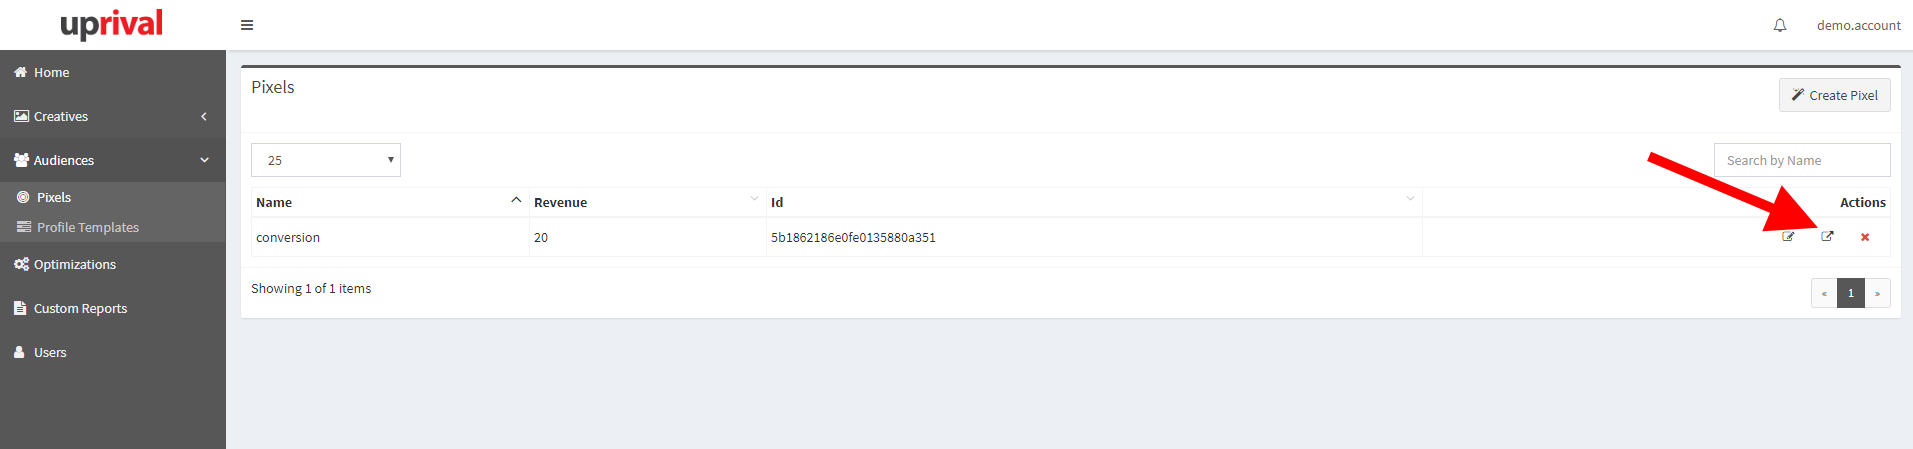
Once you have created a pixel you can get the pixel’s HTML tag by clicking on the “HTML Tags” icon located on the right side of the pixel on the Pixels page.
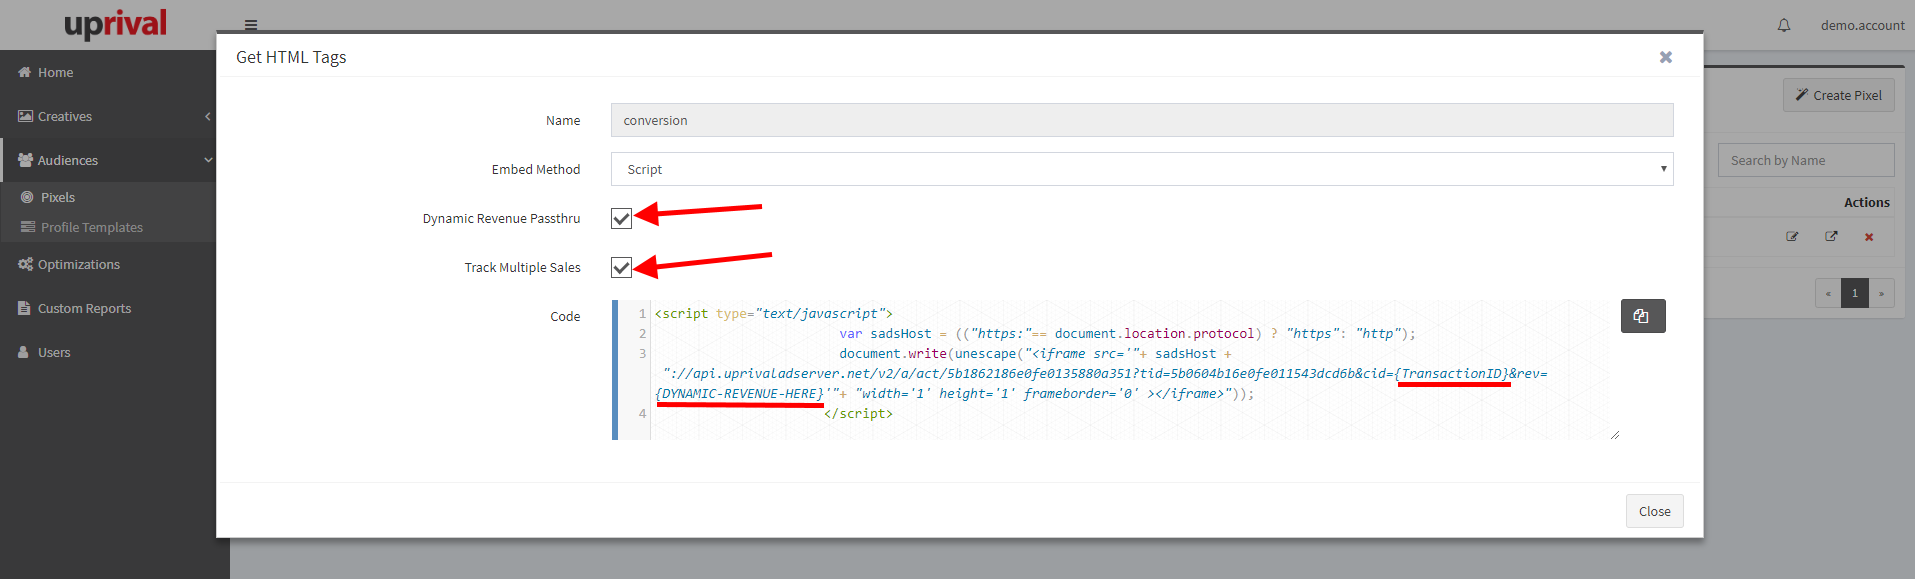
You can then choose the embed method (Script, iFrame, Image, Postback) and also check the “Dynamic Revenue Passthrough”, “Track Multiple Sales” and (if available) the "Secure SSL page" boxes.
After your pixel looks correct, click on the copy button and paste it on the “Transaction Complete” page of the offer(s) you are promoting.
Pixel Options
Dynamic Revenue Passthrough allows you to override the revenue amount of the pixel within the tag. Clicking on the “Dynamic Revenue Passthrough” box adds a new field to your tag, “rev=[DYNAMIC-REVENUE-HERE]”. Replace “[DYNAMIC-REVENUE-HERE]” with a new revenue value, or a macro from your offer source that will insert the new revenue value.
On an iFrame, image, or postback embed method, there is a “Secure SSL Page” option. Clicking on this box makes your tag SSL secure.
You can track multiple sales by clicking on the “Track Multiple Sales” checkbox. A new field will be added to the tag, “cid={TransactionID}”. Replace {TransactionID} with a unique identifier to track between multiple sales when placing the pixels on the “Transaction Complete” page of the offer you are promoting. Multiple sales will track when the click ID is the same and the Transaction IDs are different.